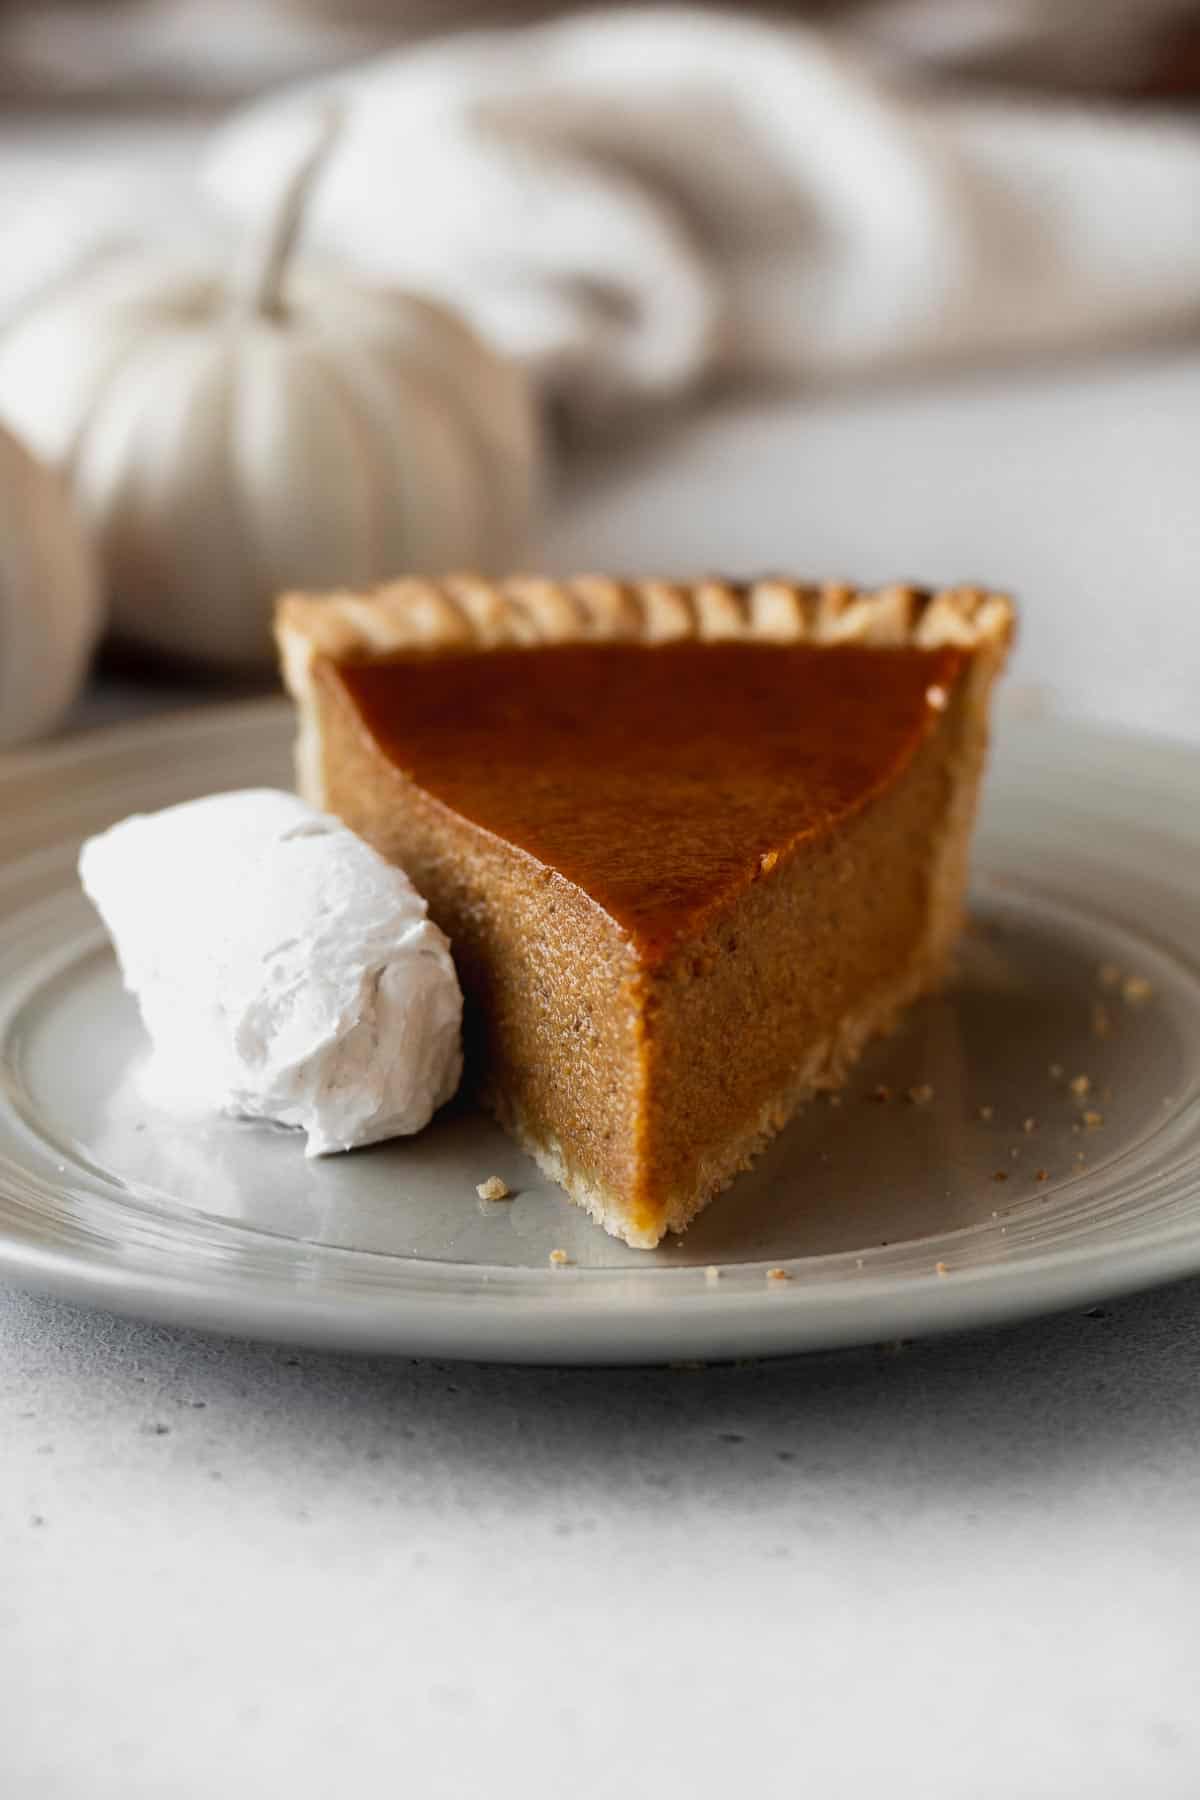
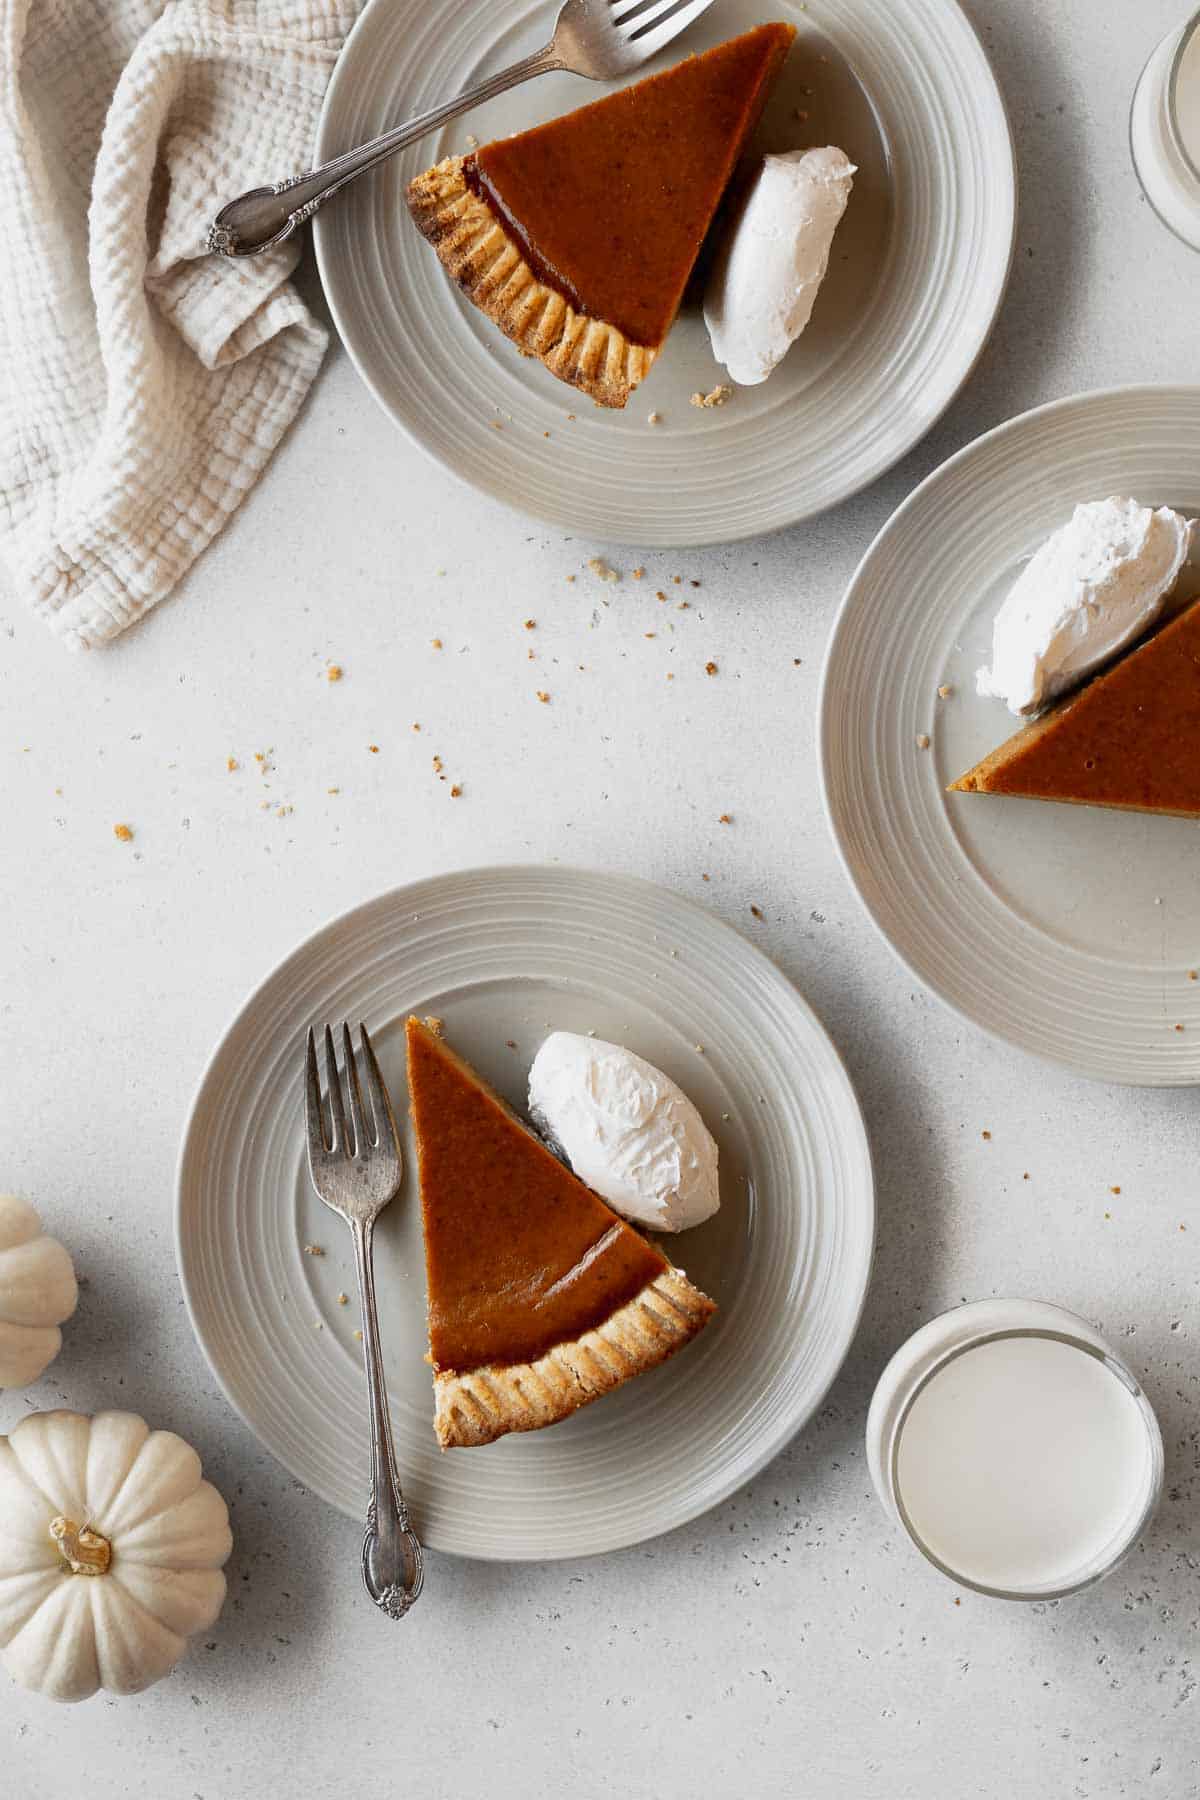
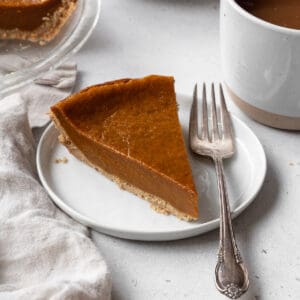
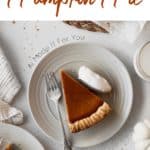
This dairy-free pumpkin pie is the perfect fall-time dessert! It uses sweetened condensed coconut milk and a combination of eggs and egg yolks for a rich and silky-smooth filling that won't crack in the oven.
As a dedicated pumpkin pie lover and recipe developer, I’ve tested this recipe over and over until it was perfectly spiced and creamy. I can confidently say it’s going to knock your socks off, and no one will be able to tell that it's dairy-free!
This recipe was originally published on November 7, 2021. It was updated with new information on September 10, 2025.
Ingredients Notes
The ingredients are fairly simple but make for a delicious pie! Here are some notes on the key ingredients you'll need:
Dairy-free pie crust - You can use store bought or homemade pie crust. Although I chose to make it myself (the instructions are in the recipe card), the star of this pie is the filling, so if you don’t have the capacity, go ahead and buy a pie crust from the grocery store. Don’t forget to read the ingredients to make sure it doesn’t contain any butter.
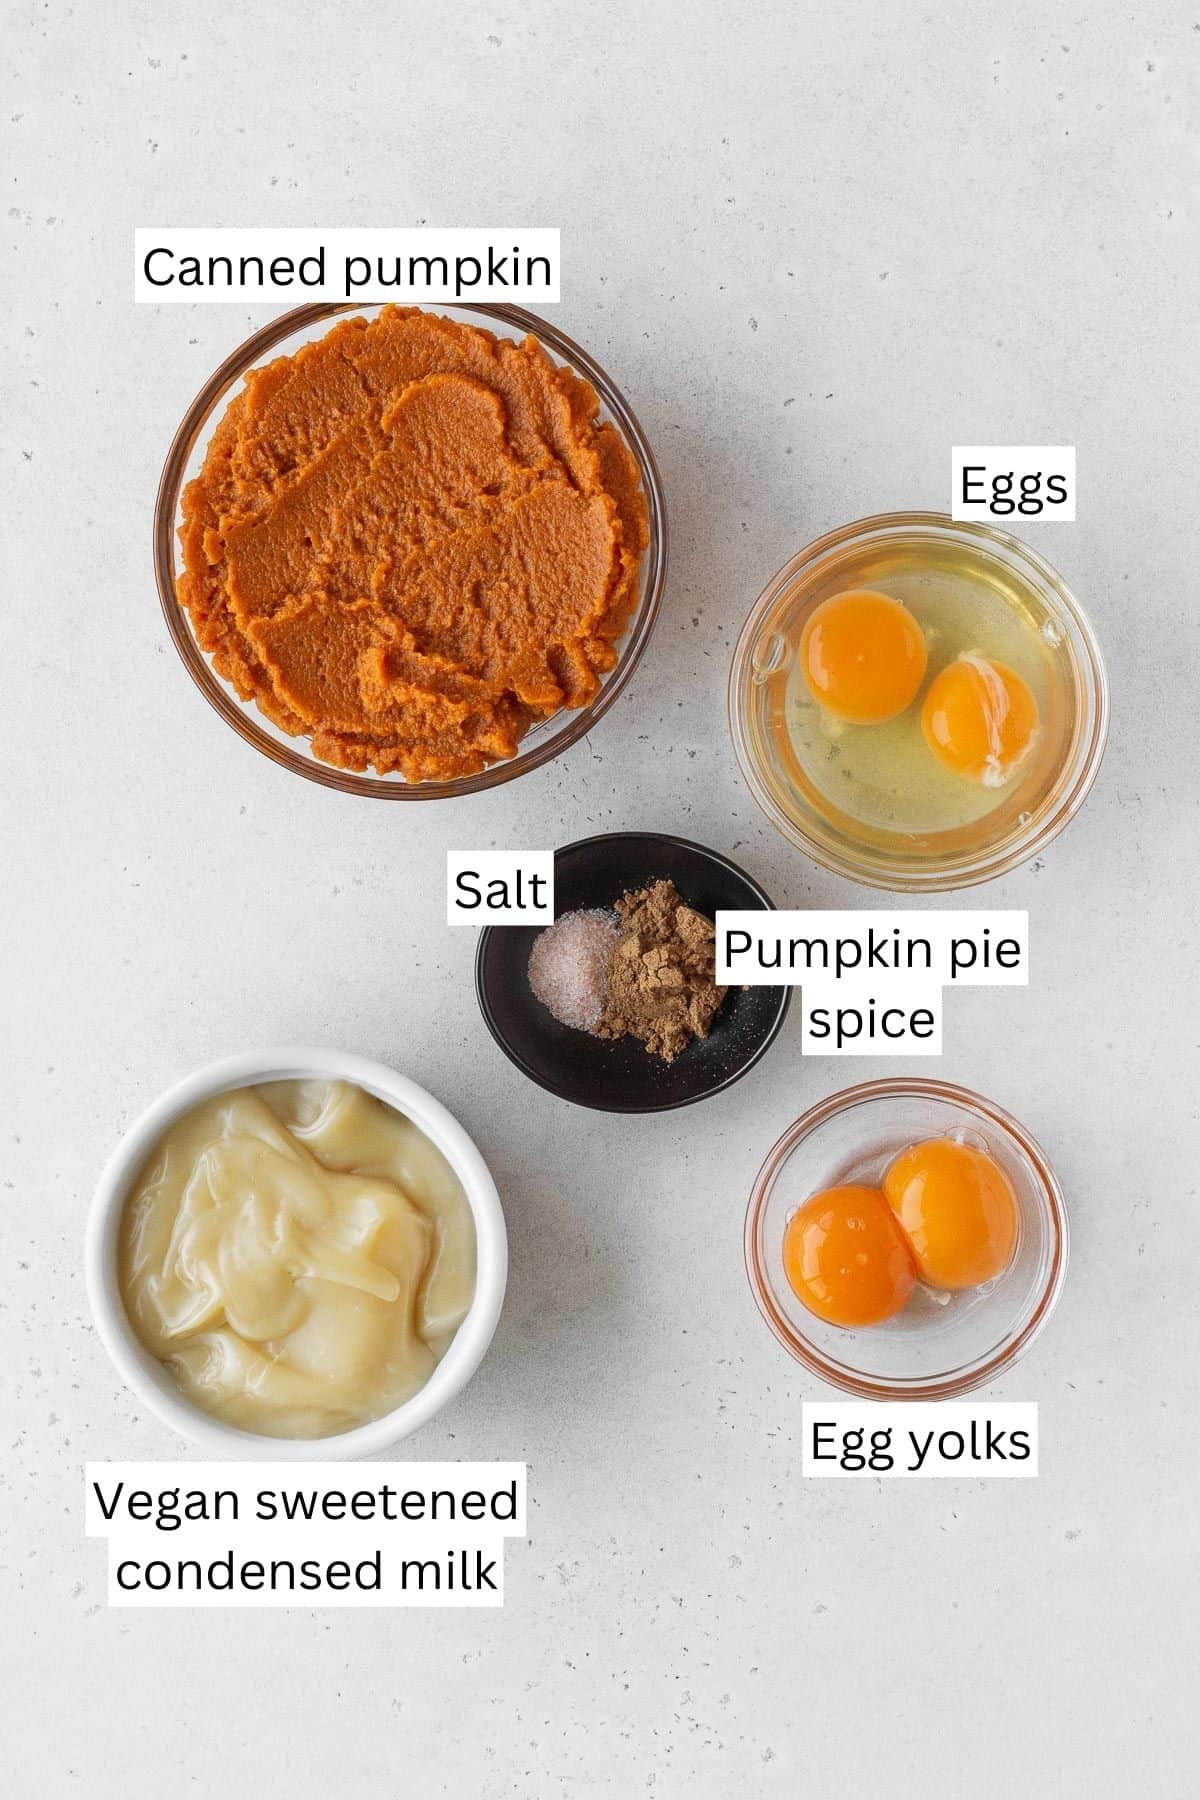
Canned pumpkin - Use a can of pure pumpkin purée, not pumpkin pie filling! Pumpkin pie filling already includes sugar and spices, so it will not work for this recipe. The cans I usually go for the big cans of E.D.Smith pure pumpkin, as it's always thick and not watery like some canned pumpkin. If your purée seems watery, strain it in a coffee filter over a fine-mesh strainer to remove excess moisture.
Vegan sweetened condensed milk - Adds sweetness and richness, but also thickens the filling more than the traditional pumpkin pie recipes that use evaporated milk. I’ve used sweetened condensed coconut milk and sweetened condensed oat milk and both work great!
Eggs - You'll need two whole eggs and two egg yolks. The egg yolks make the filling extra rich and creamy, and prevents the pie from cracking in the oven because it doesn’t have as much water in the form of egg whites.Pumpkin pie spice - For the best flavor, make sure your pumpkin spice is fresh and hasn't been sitting in your spice cabinet since last year!
How to Make Dairy Free Pumpkin Pie
Let's walk through the simple steps to make the perfect pumpkin pie! We'll start with the crust, as it needs time to chill, and then move on to the filling.
Make the Pie Crust
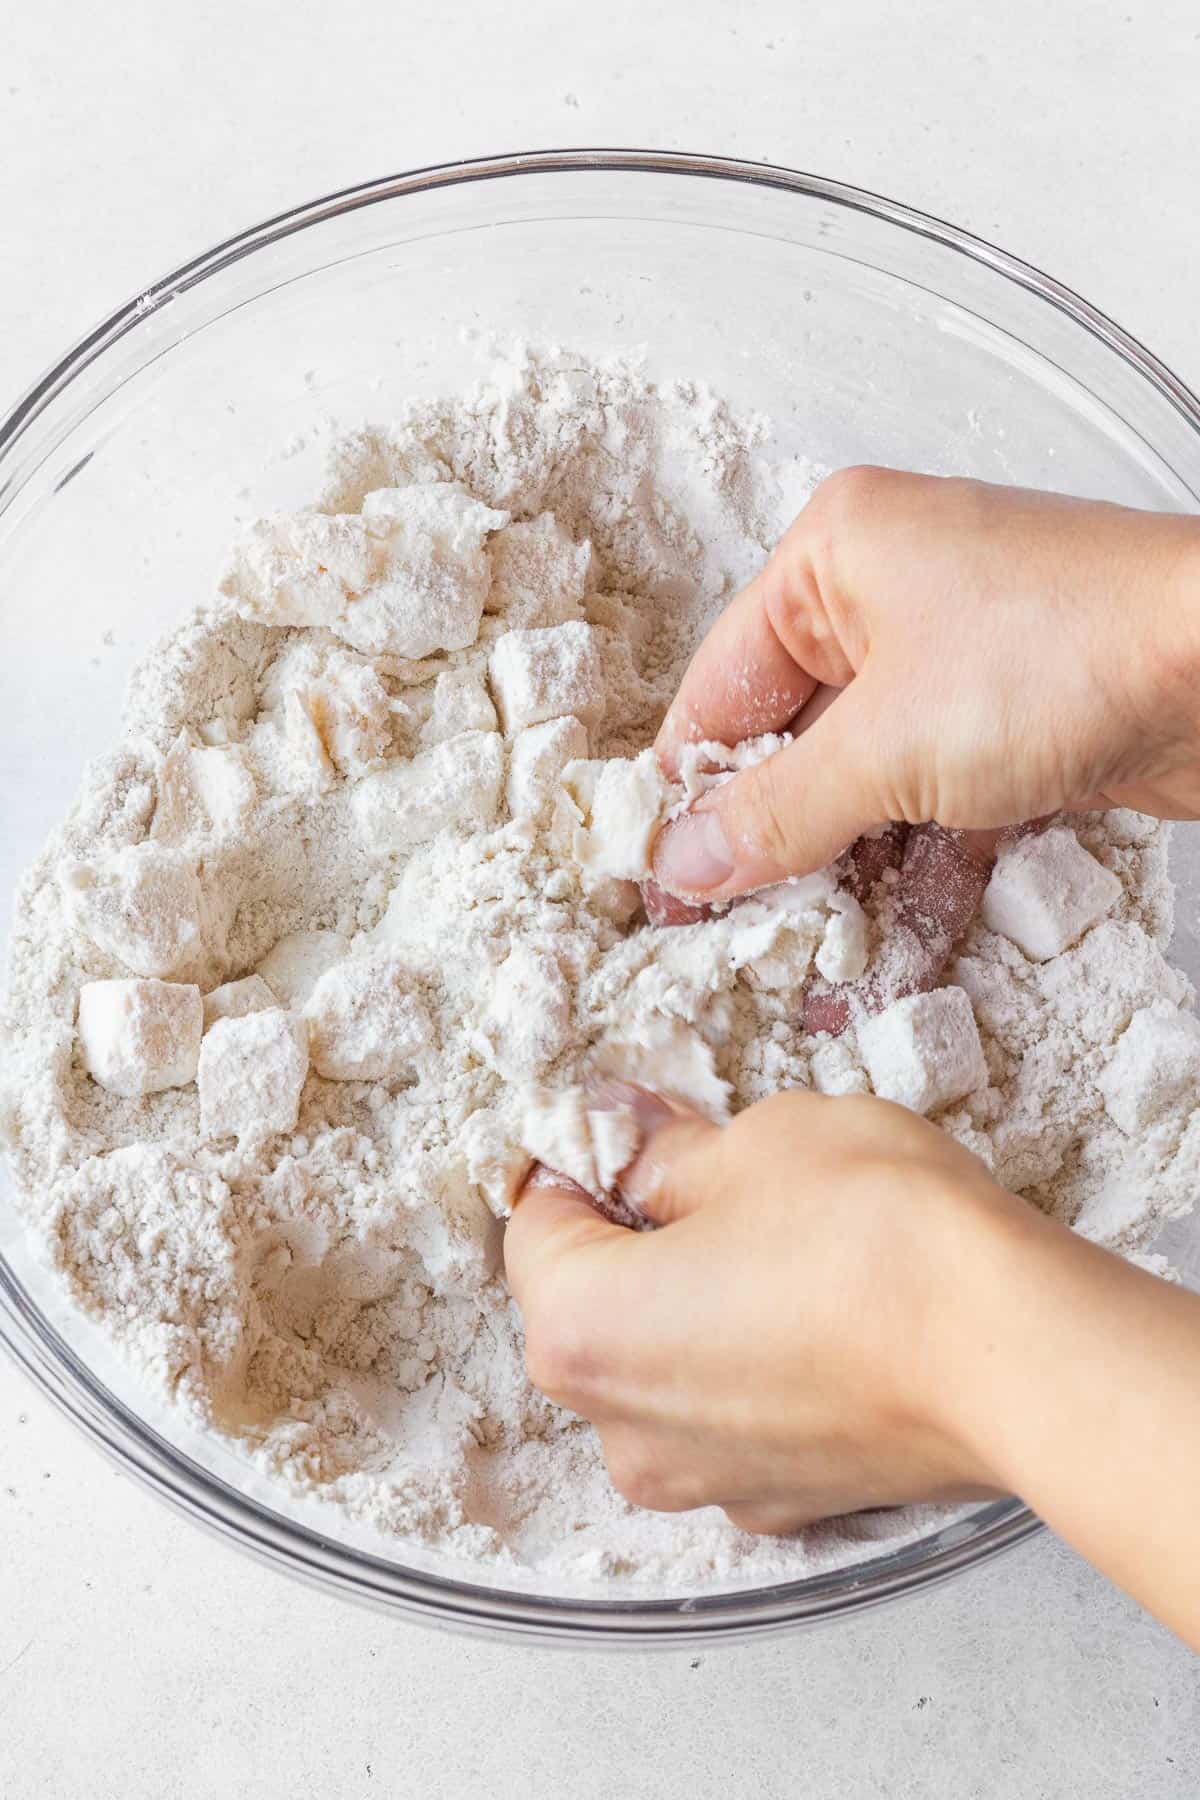
Put all the ingredients into a bowl, and use your fingers to pinch the butter and work it into the dry ingredients. Little by little, work the ice cold water into the dough.
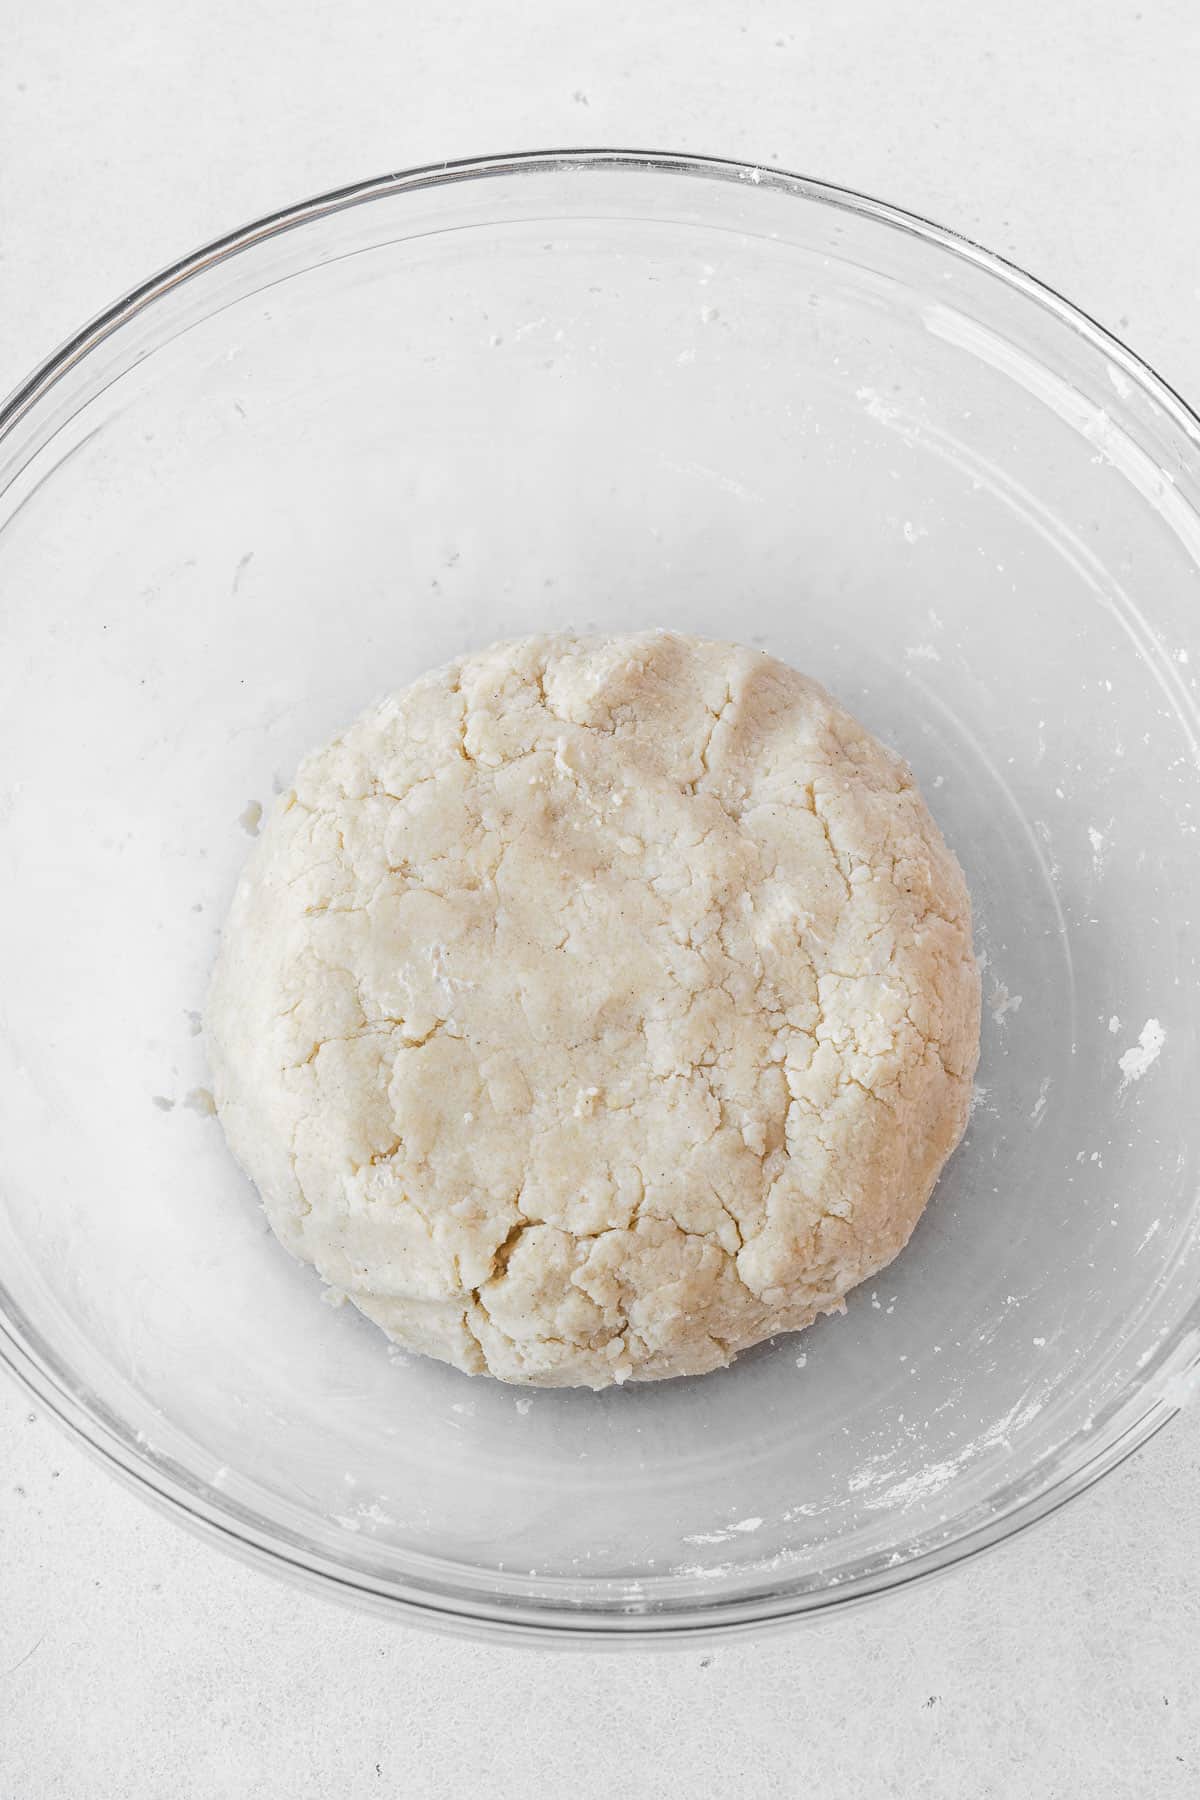
Once it comes together, shape it into a disk, wrap it in some plastic wrap, and put it in the fridge to chill for at least an hour. This helps the flour hydrate properly and the butter become cold again, for a crisp and flaky crust.
You can do this step the day before, or many days advance and just keep the dough in the freezer!
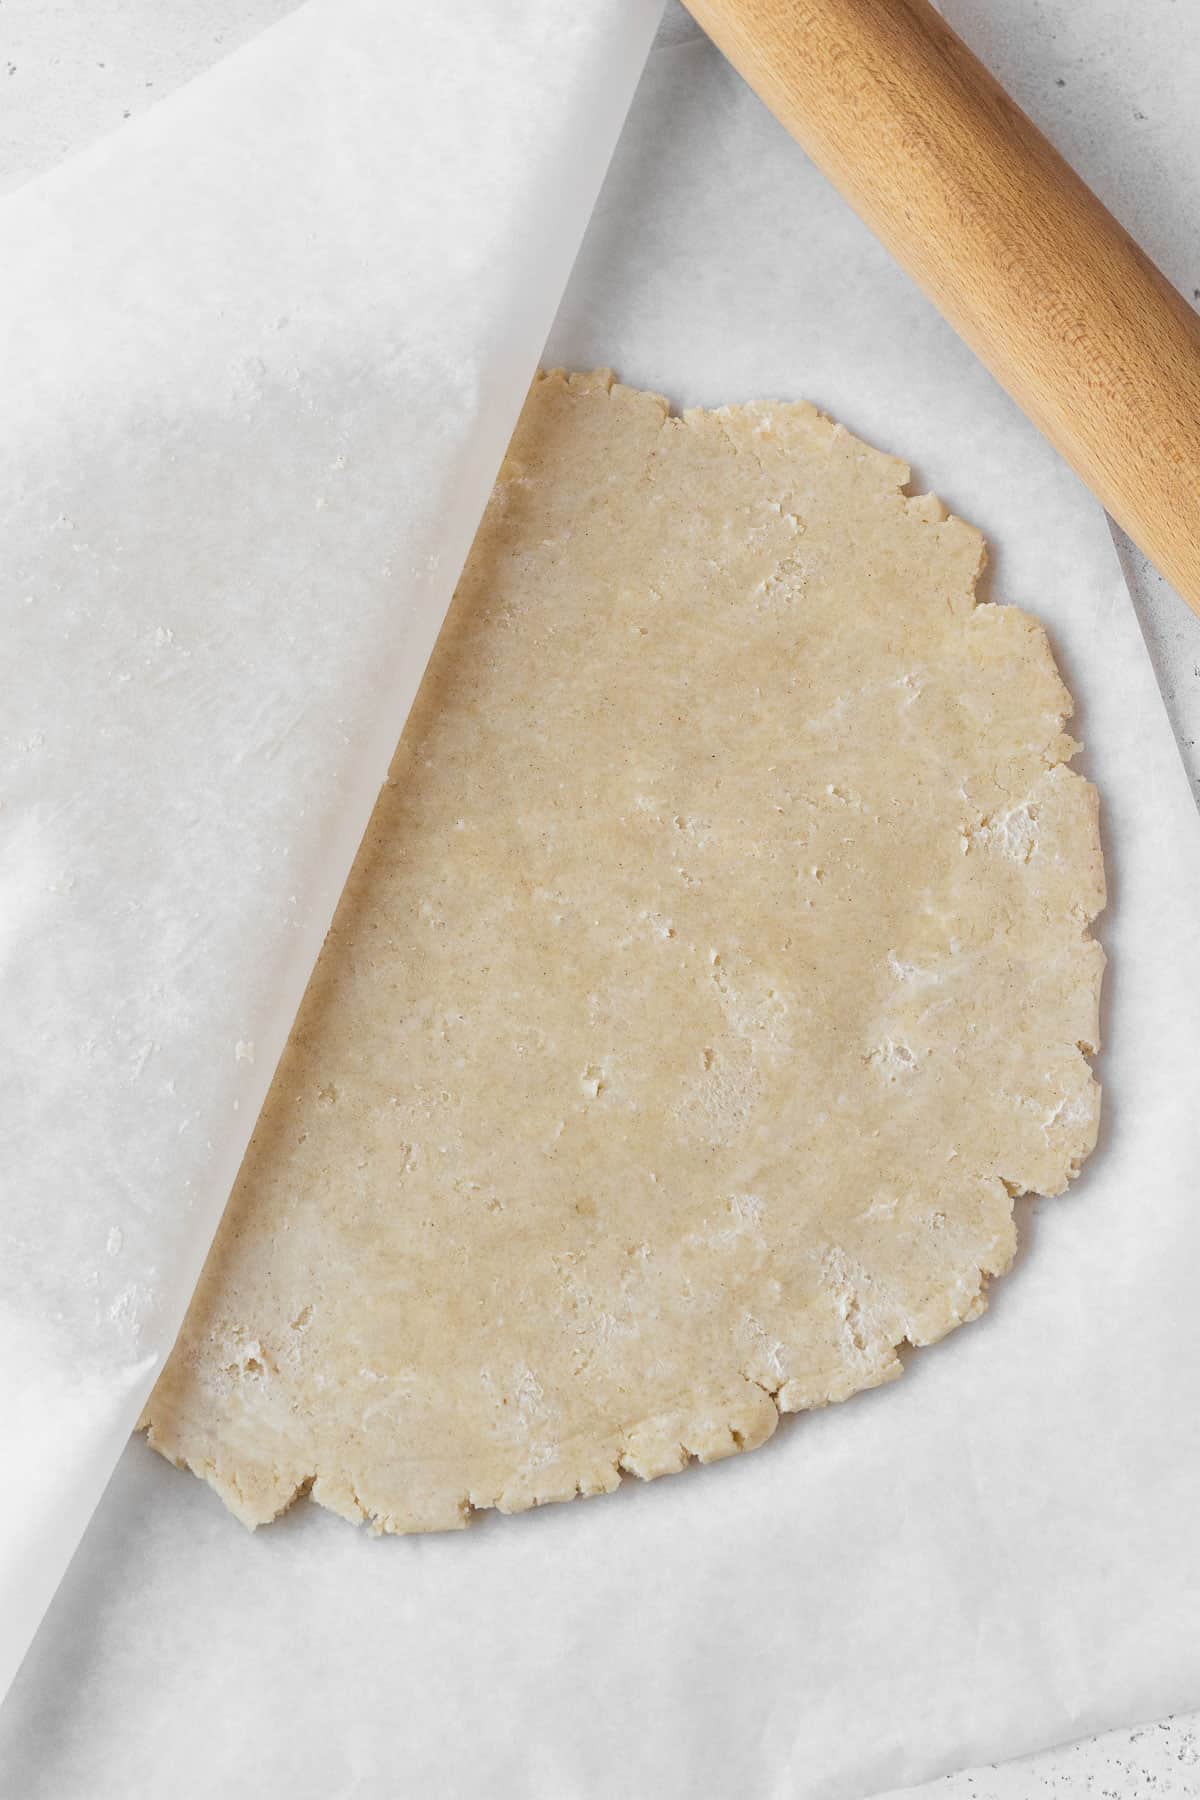
Once you're ready to make your pie, roll out the dough into a 12-inch circle and fit it into a 9-inch pie plate. Keep it in the freezer while you preheat your oven so it doesn't melt or shrink in the oven.

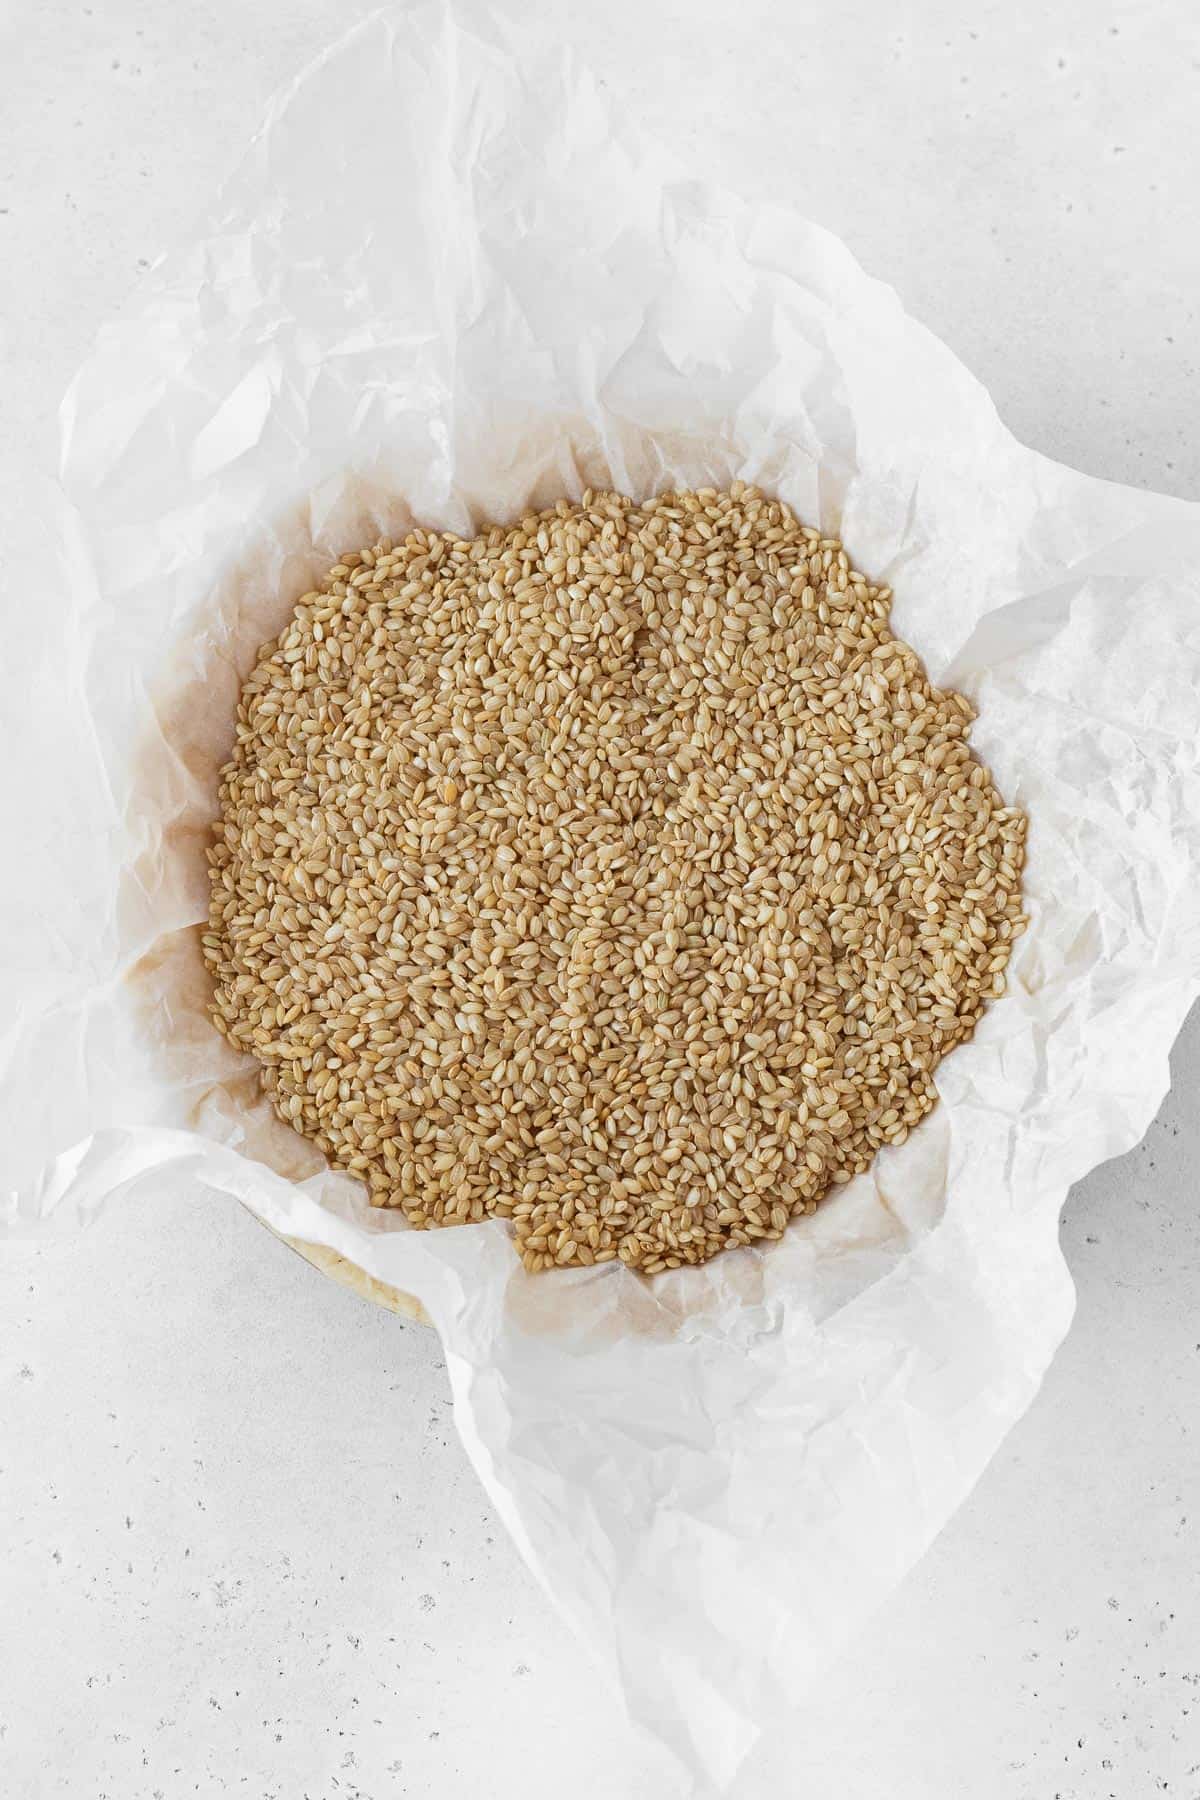
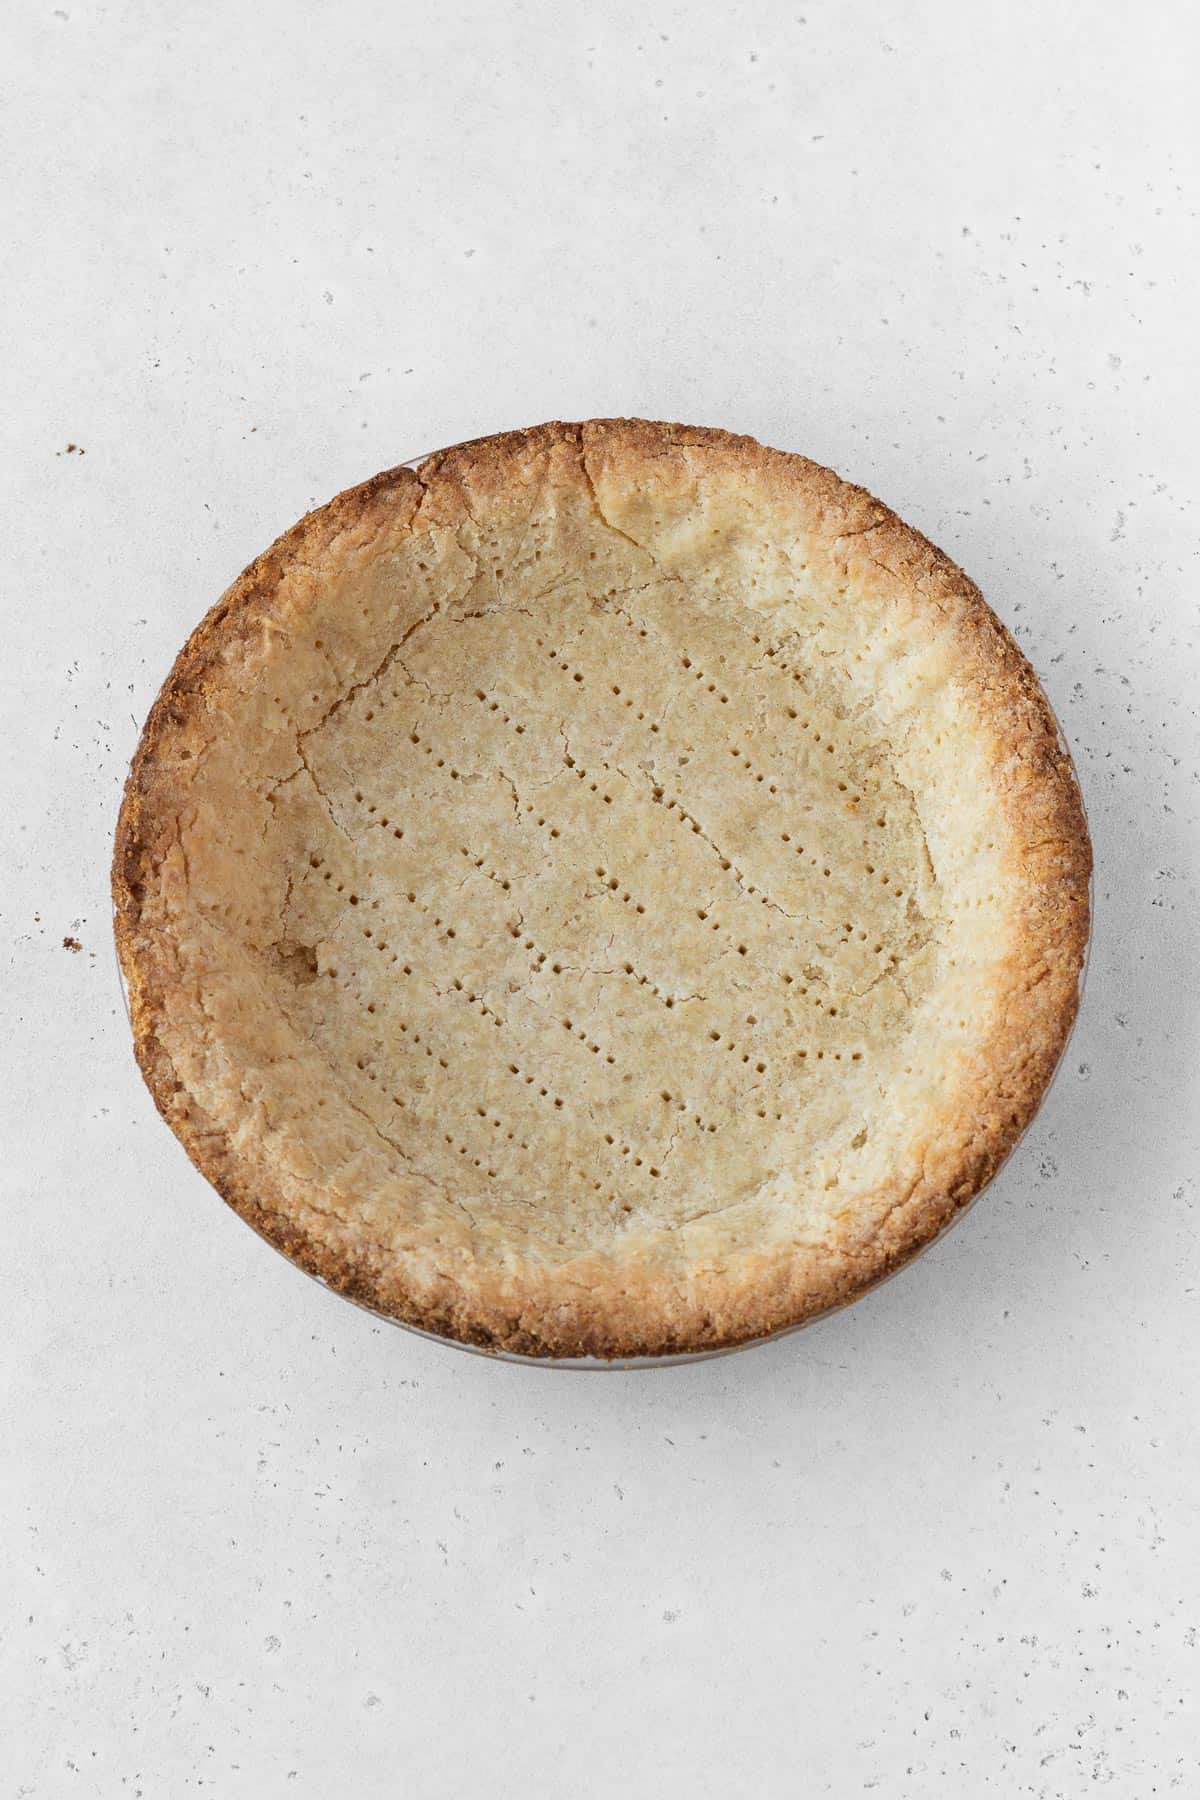
Put a piece of parchment paper into the pie crust, and fill it with pie weights, dry beans, or uncooked rice. Bake the crust for 15 minutes, take it out, remove the pie weights and parchment paper, and put it back into the oven to bake for another 10 minutes.
By blind baking the crust before adding the filling, we're giving the crust a chance to properly bake through and crisp up, and prevent the chances of getting a soggy bottom.
Make the Filling
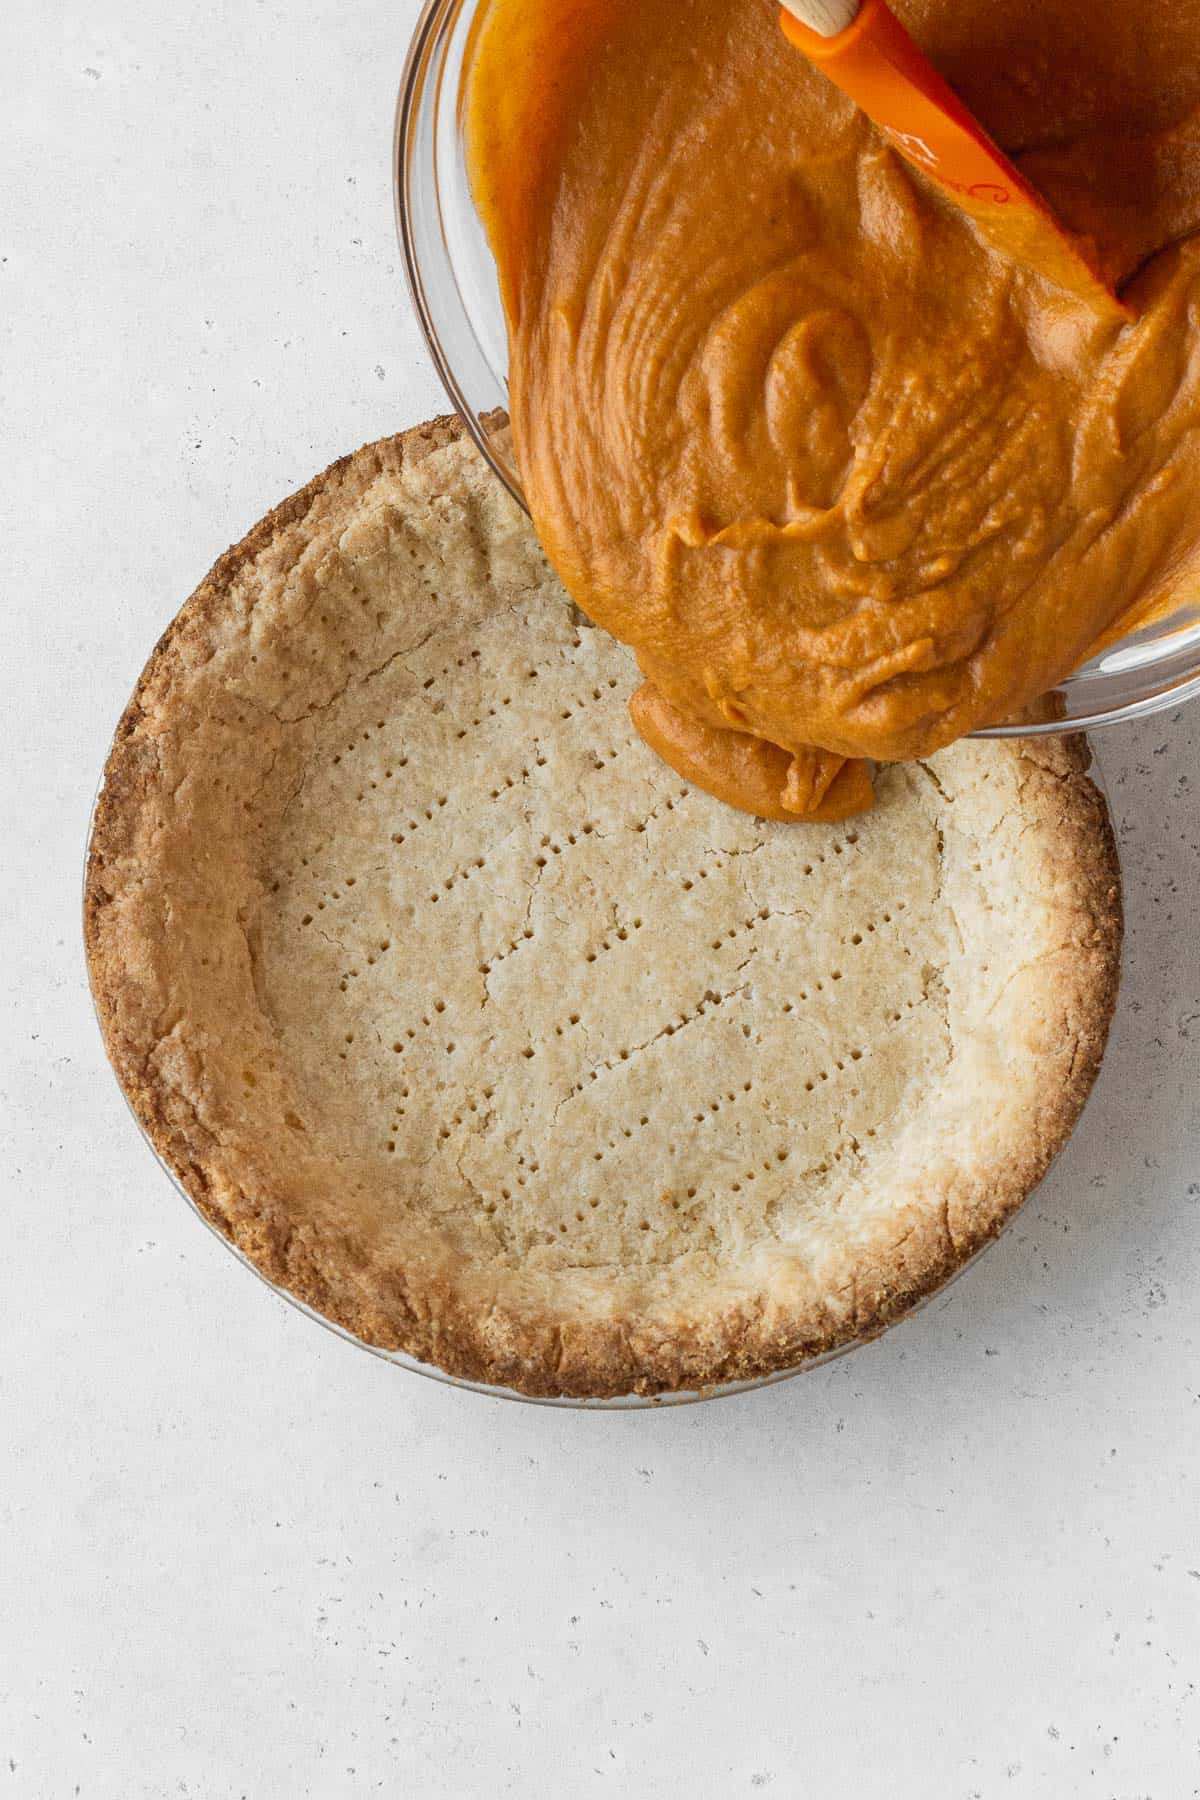
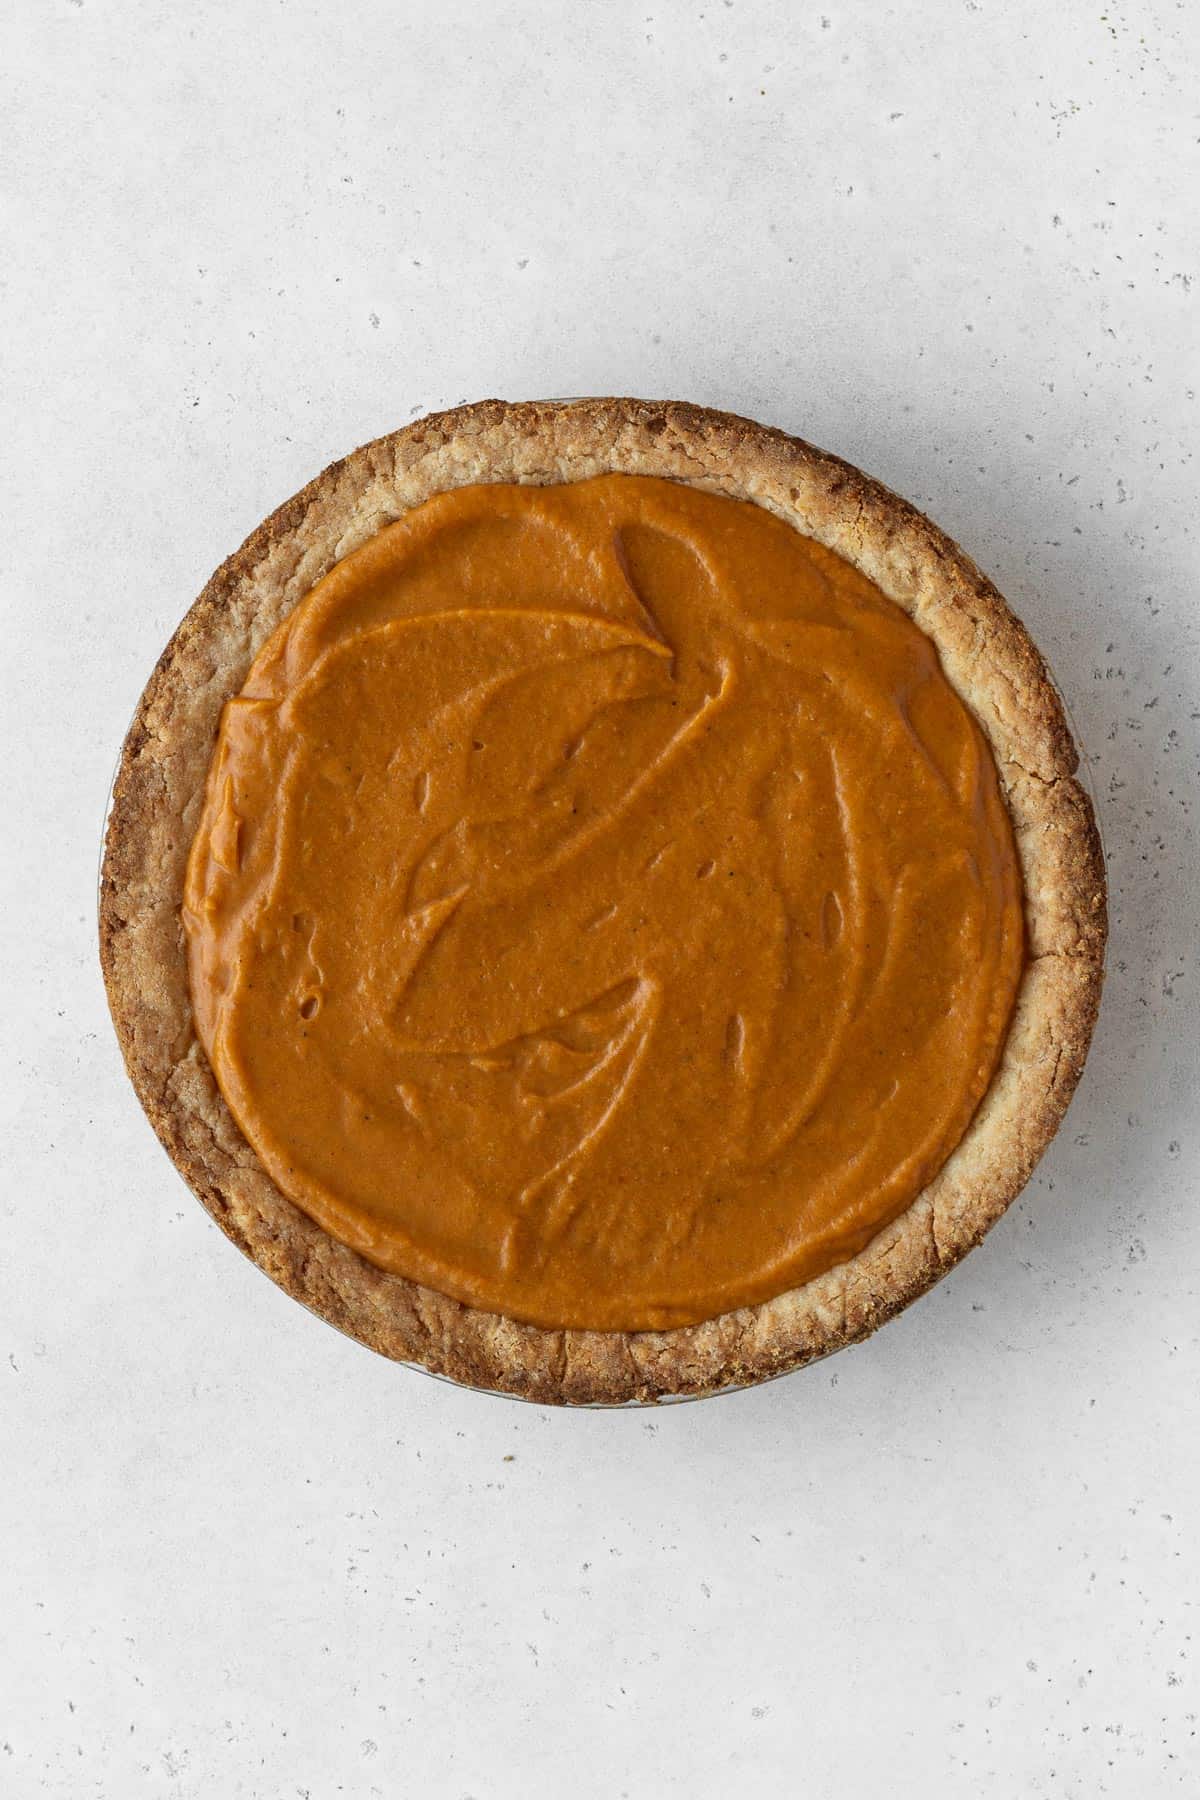
While the crust cools, put all of the filling ingredients into a bowl and whisk it together.
Pour the mixture into the cooled pie crust, cover the edges of the crust with foil so it doesn't burn, and bake it at 425°F (220°C) for 15 minutes.

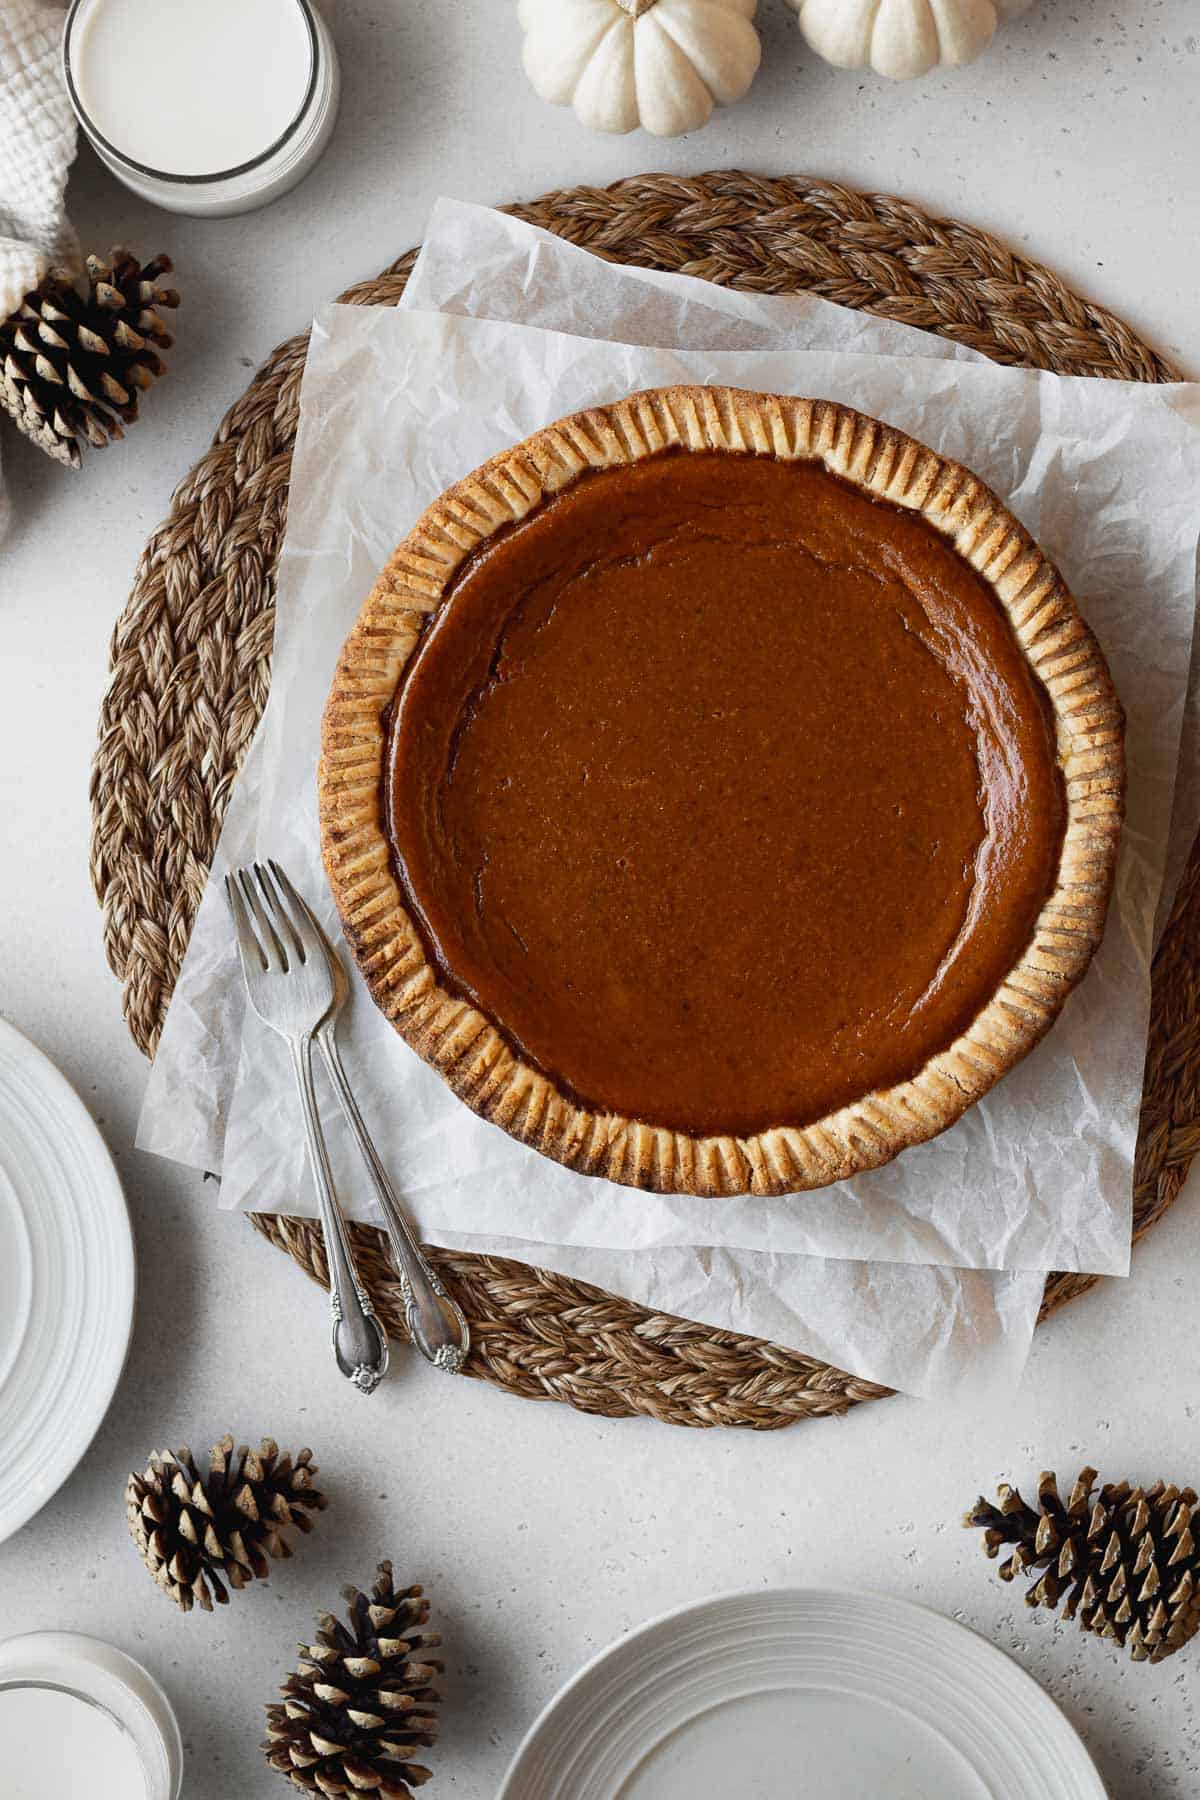
Without opening the oven door, lower the temperature to 320°F (160°C) and keep baking the pie for about 35 minutes. When it's done, the center should be jiggly but not loose, and the tip of a sharp knife inserted into the filling about an inch from the pie crust should come out clean.
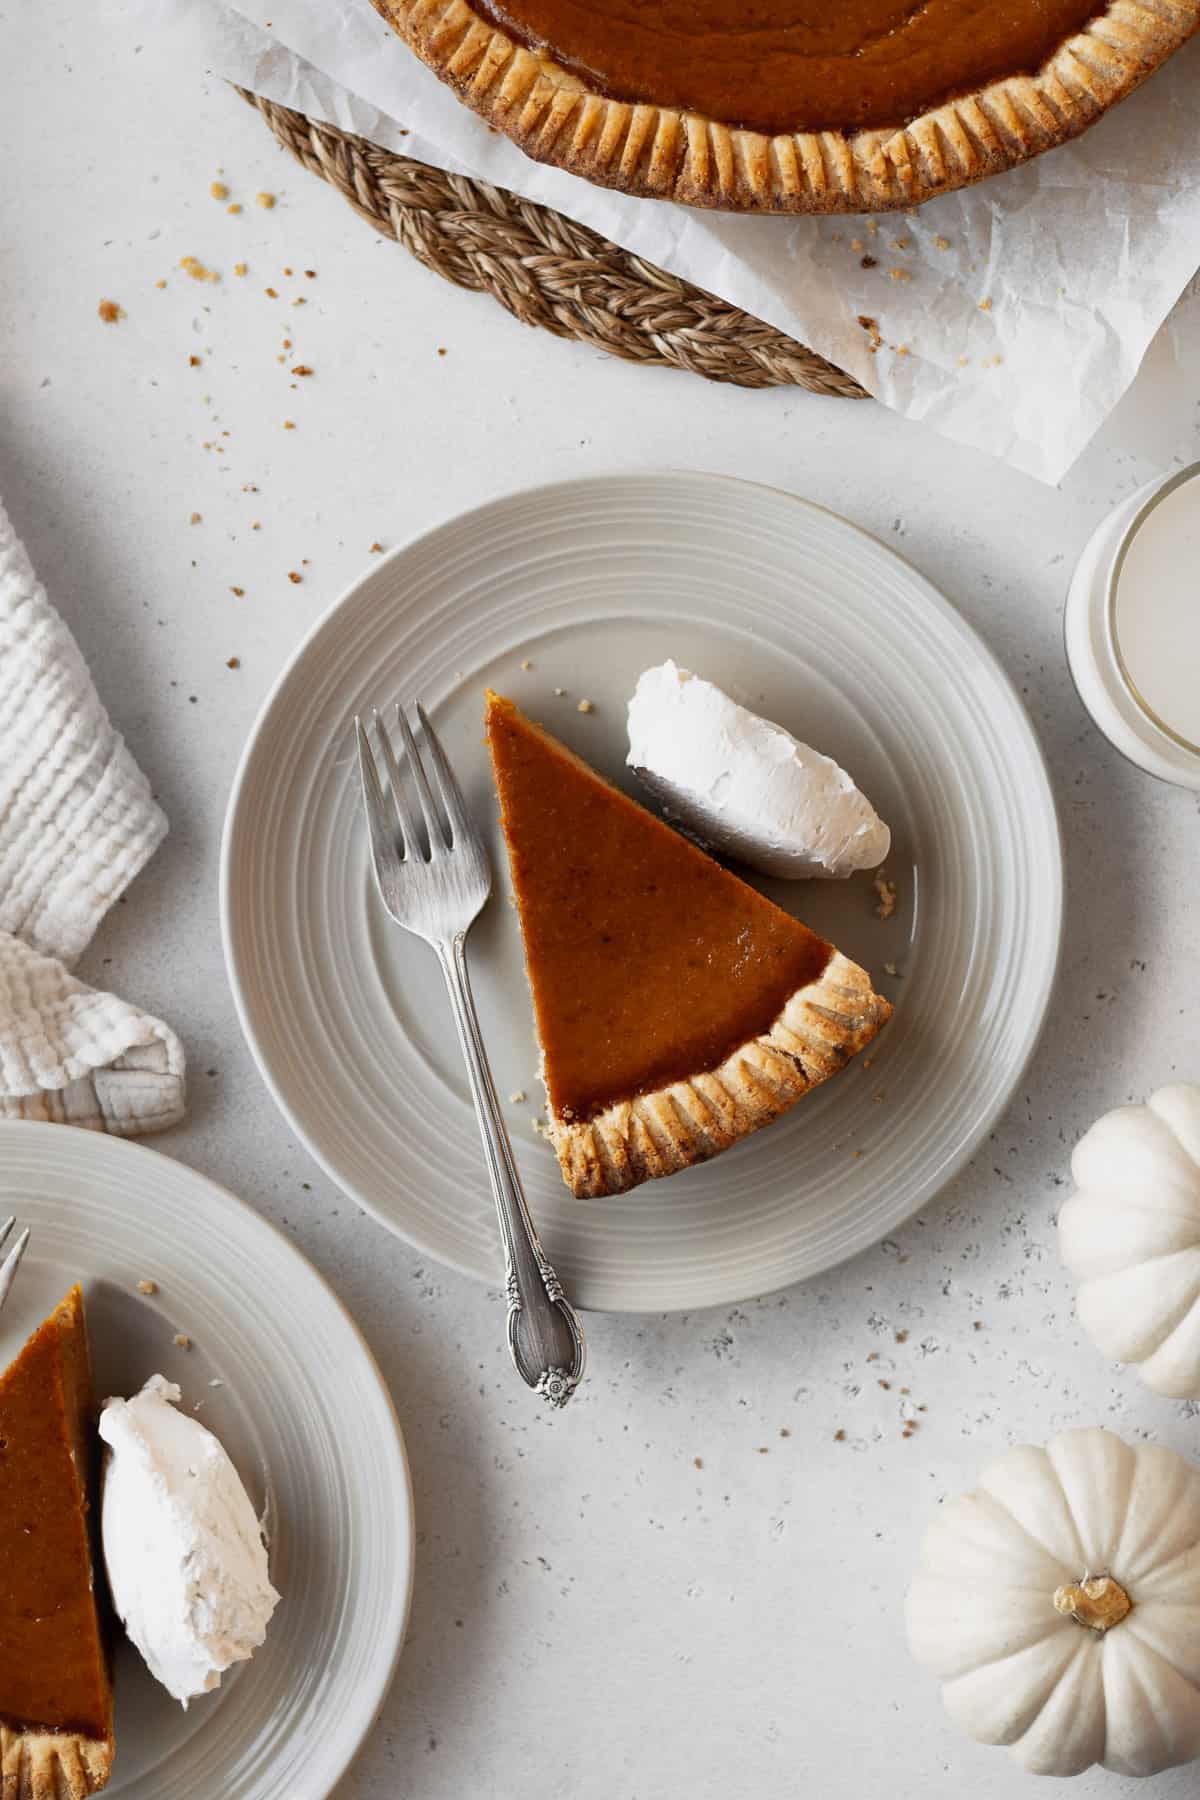
Let the pie cool completely on the counter before serving. Cut into it warm and you'll be serving liquid pumpkin pie. Store the pie in the fridge, preferably uncovered to avoid condensation.
Pumpkin Pie Pro Tips
Here are some important tips to help you make the best pumpkin pie every time:
Use chilled ingredients for the pie crust. For a crisp pie crust, it’s very important to use chilled butter and shortening, and ice water. To help the fats stay cold, you can even chill all the other pie crust ingredients before making the dough.
Use room temperature ingredients for the filling. Unlike the pie crust ingredients, the filling ingredients should all be at room temperature to help it bake evenly in the oven.
Chill the pie dough before baking. To ensure the pie crust doesn’t melt away in the oven, chill it in the freezer for 10 to 15 minutes before baking it.
Blind bake the pie crust. You want to fully bake the crust so it can maintain its crispiness even after adding the pumpkin filling. No soggy bottoms for this non-dairy pumpkin pie recipe!
Don't overbake the pie. Pumpkin pies are notorious for cracking. The culprit: overcooked eggs. To prevent the pie from getting a cracked surface, make sure to only bake it until the center is jiggly, but not loose.
Let it cool completely. The pie will continue to cook and set as it cools, so let it cool completely and chill it in the fridge before you cut into it.
Dairy-Free Pumpkin Pie Recipe
Ingredients
Pie crust
- 2 cups all-purpose flour
- ½ cup almond flour
- 2 tablespoons cornstarch
- 2 tablespoons granulated sugar
- 1 teaspoon fine salt
- ½ teaspoon baking powder
- ½ cup vegan butter cubed and chilled
- ½ cup shortening cubed and chilled
- 6 tablespoons ice cold water
Filling
- 15 oz canned pumpkin (not pumpkin pie filling)
- 11.25 oz non-dairy sweetened condensed milk
- 2 large eggs
- 2 egg yolks
- 2 teaspoons pumpkin pie spice
- ½ teaspoon fine salt
Instructions
Make the pie crust
- In a bowl, combine all-purpose flour, almond flour, cornstarch, sugar, salt, and baking powder.
- Add the cold cubes of butter and shortening. Use your fingers, pinch the butter and shortening, and work them into the flour mixture.
- Add the ice-cold water in 1 tablespoon at a time, until the dough comes together.
- Shape the dough into a circular disk, wrap it up, and let it rest in the fridge for at least an hour.
- Take the rested dough out onto a floured piece of parchment paper. Sprinkle more flour on the dough or add another layer of parchment paper on top and use a rolling pin to roll it out into a roughly 12-inch circle.
- Take the dough and fit it into a 9-inch glass pie plate. Lift the edges of the dough, settle it into the pie plate, and press it down. Check the bottom of the pie plate and make sure there are no air bubbles between the pie plate and the dough.
- Use scissors or a knife to trim off the edges of the pie crust. You can decorate the edges of the pie however you like. Prick the bottom and sides of the pie crust using a fork. Put the pie plate into the freezer for 10-15 minutes (it should be the same amount of time it takes for the oven to preheat).
- Preheat the oven to 425°F (220°C). Take the pie plate out of the freezer, put a large piece of crumpled parchment paper into the pie crust, and fill it to the top with pie weights (use dry beans or uncooked rice as a cheap alternative).
- Bake the crust in the preheated oven for 15 minutes. Take the pie out of the oven, remove the pie weights out of the crust by lifting the parchment paper, and put the pie crust back into the oven for another 10 minutes. Take it out of the oven and let it cool.
Make the filling
- Preheat the oven to 425°F (220°C).
- In a large bowl, whisk together the pumpkin, condensed milk, eggs, egg yolks, pumpkin pie spice, and salt.
- Pour the mixture into the cooled pie crust. Tent the edges of the pie crust with aluminum foil or a silicone protector to avoid burning. Bake the pie for 15 minutes. Without opening the oven door, lower the temperature to 320°F (160°C) and bake for another 35-37 minutes, until the center is jiggly but not loose. You can check for doneness by inserting the tip of a sharp knife into the filling about an inch from the pie crust. It should come out moist but clean.
- Let the pie cool completely on the counter before serving. Store in the fridge.
Nutrition
Storage and freezing directions:
Refrigerating: Keep leftover slices in an airtight container or covered with plastic wrap in the fridge for up to 2 days. Pumpkin pies tend to “weep”, where the moisture rises to the surface. If your pumpkin pie starts to weep, just blot the excess moisture with a clean paper towel.
Freezing a whole pie: If you’re planning to freeze the whole pie, bake the pie in a disposable pie pan. Cool the pie completely, and wrap it tightly in a couple of layers of plastic wrap followed by a layer of aluminum foil. Put the pie in a large freezer bag for extra protection against freezer burn. Put the pie in the fridge for 24 hours to let it defrost.
Freezing individual slices: You can wrap each slice tightly in a couple of layers of plastic wrap followed by a layer of aluminum foil before putting it in a freezer bag or airtight container. Let it defrost in the fridge for at least 12 hours.
Frequently Asked Questions
Yes, traditional pumpkin pie does have dairy in the form of evaporated milk. To make pumpkin pie dairy-free, I’ve used vegan sweetened condensed milk in my recipe!
No, eggs are not dairy, although some people confuse them to be. Dairy only refers to products that come from the milk of mammals (cows, goats, sheep, etc.). These would include milk, cheese, butter, and yogurt. Eggs are often placed by the dairy products in grocery stores, which is partly why some people think they belong in the same food group.
No, you can’t substitute the sweetened condensed coconut milk in this recipe with creamer. It acts as the dairy-free substitute for evaporated milk that’s in traditional pumpkin pie recipes, as well as the source of sweetness.
Not at all! If you’re worried, Nature's Charm makes sweetened condensed oat milk, which also works in this recipe.
Yes! The filling contains no gluten, so all you'll have to do is adjust the crust ingredients to make a gluten and dairy-free pumpkin pie. Substitute gluten-free measure-for-measure flour for the all-purpose flour, and follow the same steps to make the crust. You can also use a store-bought gluten-free pie crust that's usually sold in the freezer aisle.
No, sorry, the eggs and egg yolks are essential to both the flavor and texture of this pie so you can’t swap them out. Lucky for you, I have a delicious vegan pumpkin pie recipe that you can make instead!
You can make this pie a day ahead and keep it in the fridge. Alternatively, you can make just the pie dough up to a month ahead. Wrap it in a few layers of plastic and keep it in an airtight bag in the freezer. When you're ready to use it, defrost it in the fridge for 12-24 hours before you roll it out.
Serve your pumpkin pie with coconut whipped cream or a scoop of your favorite dairy-free vanilla ice cream!
More Dairy-Free Thanksgiving Recipes
Want more pumpkin desserts? Try this gluten-free pumpkin bread! It's moist and perfectly spiced.
If you love soup, try my creamy pumpkin soup! Bonus points if you top it with cornbread croutons.
You can't have Thanksgiving without my gluten free cornbread! It's moist, fluffy, a touch sweet, and very corny.
Are you a fellow Brussels sprouts lover? My roasted Brussels sprouts recipe has bacon, pecans, and dried cranberries in it, making it super fun and delicious to eat!
If you want to try something unconventional, try my rice stuffing! It's vegan but super flavorful.


Danielle says
Delicious pumpkin pie- thanks for another great dairy free recipe! We roasted our peach colored Halloween pumpkins and they were great as the filling.
Ai says
I'm so glad you liked the pumpkin pie, Danielle! Thank you so much for taking the time to leave such a lovely comment❤️